Monday, March 12, 2012

Beef Stroganoff

Here is another one of my most favorite recipes, and has to be among the easiest to prepare. And it makes terrific leftovers, so even tho' I'm only cooking for 2, I always fix lots of this to make sure we have leftovers.

1.5 to 2 pounds hamburger
2 cans (regular size) cream of mushroom soup
16 oz. carton sour cream
1/4 of an onion, coarsely chopped
1-2 cloves garlic (depending on how much you like garlic)
Salt & pepper to taste


Using a large skillet (something similar to the one pictured here) brown your hamburger with the coarsely chopped onion and then drain it. Add the soup, sour cream, garlic, salt & pepper to the meat and stir until mixed well and slightly bubbly. Remove from heat. That's it! You're ready to eat....


I most often use the stroganoff along with potatoes, either mashed or baked, but the stroganoff goes great with rice as well as noodles. Whatever you prefer.

Friday, March 9, 2012

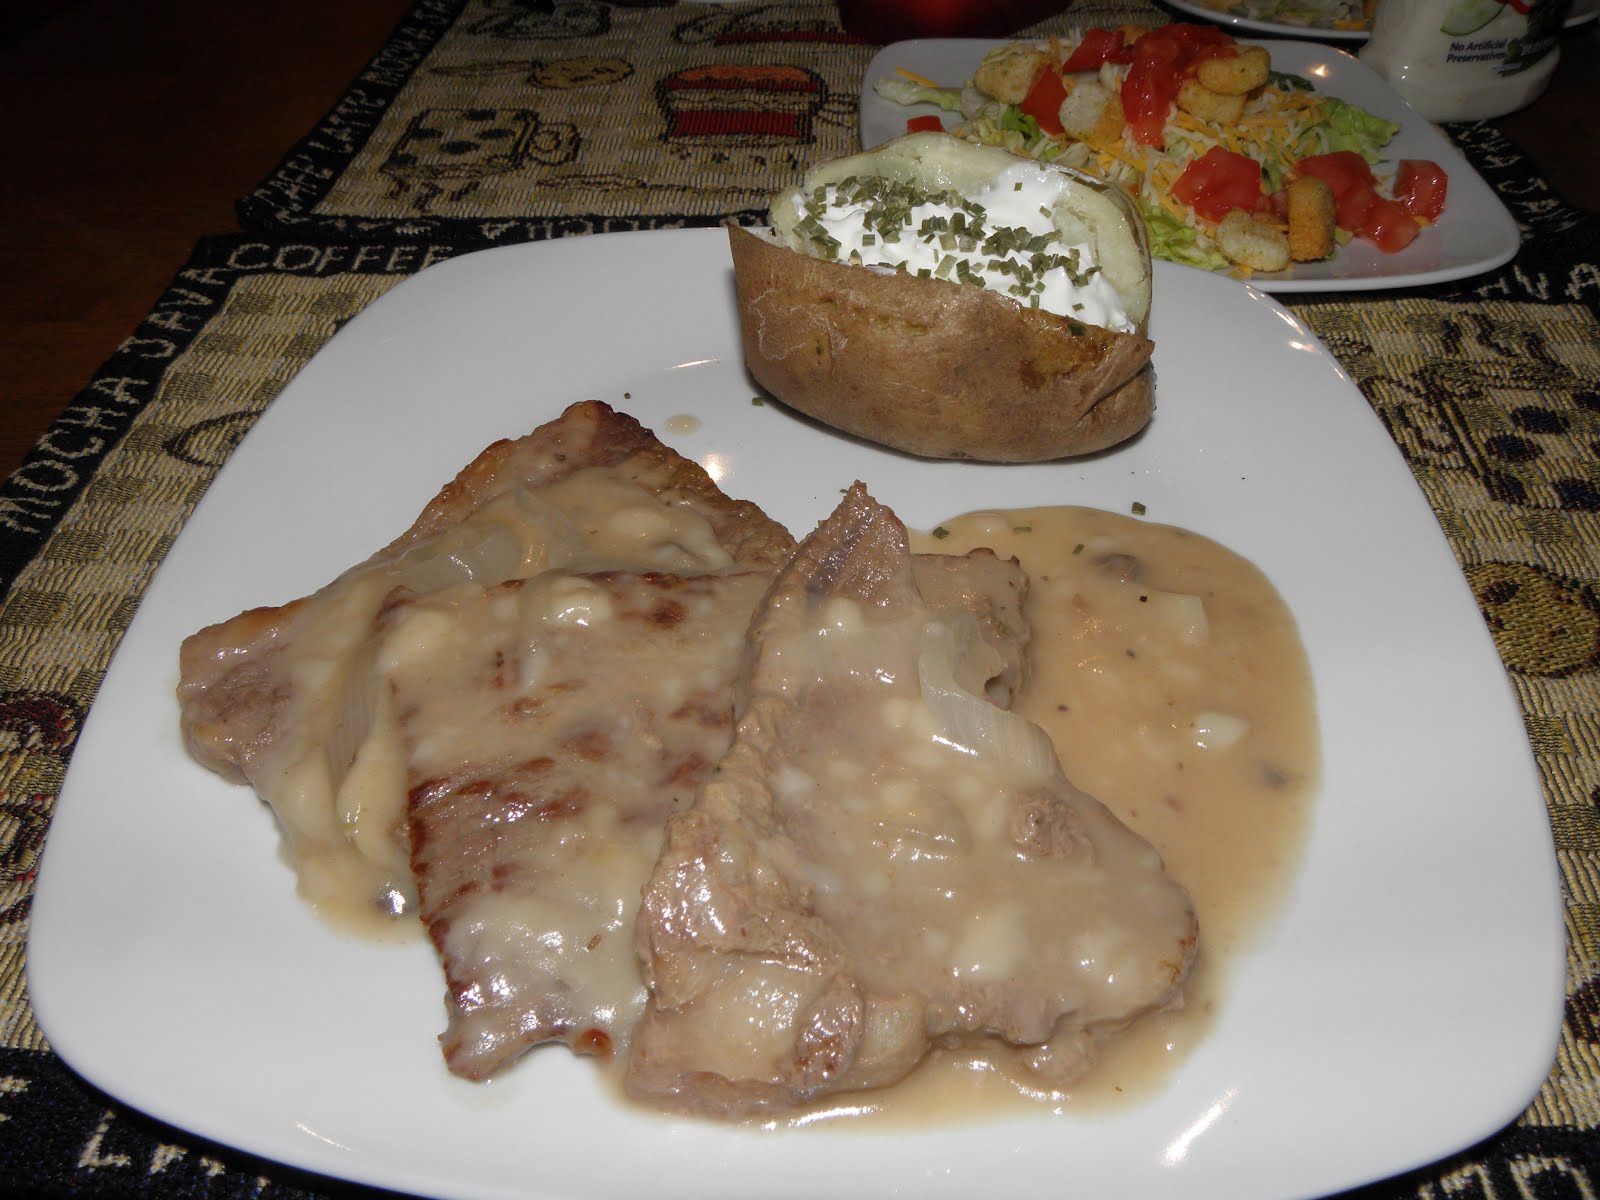
Swiss Steak in Mushroom Sauce

My Mom often made Swiss Steak when I was a kid, and I loved it. It was one of my favorites meals Mom made. But I always thought this dish had something to do with Switzerland. Not until I was in my late teens or so, did I find out that the word swiss, as in Swiss Steak, meant the process of preparing the meat, and had nothing to do with the country of yodeling! Even so, it remains to this day, one of my favorite meals.

To "swiss" the meat means to pound it thin, or to pound it tender, or to cook it on low temps for longer periods of time to tenderize it. Typically you would use a cheaper cut of meat that tends to be on the tougher side. Today I am using beef bottom round steak. Lucky me, the butcher had already cut this meat into thin pieces and I didn't have to do any pounding.

2 pounds beef bottom round or beef chuck
1/2 an onion, sliced into thin strips
1 can cream of mushroom soup
Salt & Pepper to taste


If your beef pieces are on the larger size, cut them into serving sized pieces. If they are more than about half an inch thick, pound them a few times until they are about half an inch thick. (I usually put plastic wrap around it loosely, so any pounding induced splatters don't get me.) Place in a skillet over medium heat until all sides are browned. It won't take very long. (Some people flour their meat before browning it, but I don't do that step.)

Preheat oven to 300.

While the meat is browning, take your covered casserole and put about 1/3 of the can of undiluted cream of mushroom soup on the bottom. Place about 1/3 of your onion slices over that.


When the meat is browned on all sides, place it on top of the mushroom soup & onions in the bottom. Then top with the remaining soup & onions. Sprinkle salt and pepper if you wish.

Place the cover on the casserole and put in oven for two hours.

The mushroom soup will thin out a little but not a lot. You can use it to make gravy if you wish but we just use it as a 'sauce' over the meat. The meat should be quite tender.

Thursday, March 8, 2012

Liquid Soap


I've seen a few posts on Pinterest about making your own liquid hand soap and I just knew I was going to try that someday. Today was the day.

I have a little box with several bars of nice smelling soap that I have been saving for some special occasion. I guess I still haven't figured out what kind of occasion that may be. I chose a package of soap that was "Verbena" scented and it was from France. Should make good hand soap, right?

There were 5 little bars in the package, each were .88 ounces. Let's just call them 1 ounce bars, so I used a total of 2 ounces of bar soap.

I used a microplaner, but you can use any kind of grater that will shred the soap into tiny pieces. I grated down those 2 little bars and had a mound of soap (which I forgot to take a picture of) that would have been equal to about a cup and a half....or so.

I used a good sized metal pot and put 64 ounces of water into it, 1 Tbsp glycerin (available at any health food or vitamin store in the skin care section) and the soap shavings.

I turned the heat on to medium and stirred the mix every 10-15 minutes. It took about 30 minutes for the soap to appear all melted and then I turned the heat off and moved the pot to a cool burner. I continued to stir every 15-30 minutes. After about 2 hours it started to "gel" for lack of a better term. I let it set for about 30 minutes and came back to what seemed like jello. But I stirred it for a couple minutes and it came back to a nice, smooth, soap-like consistency. But I felt it was too thick so I added 12 more ounces of water and stirred for a couple more minutes. Then back to leaving it sit for 15-20 minutes before stirring some more.


I also added several drops of lemon essential oil.


Here is a picture of the microplaner, in case you didn't know what I meant by that. This is the mixture after sitting for a couple hours, and having been stirred every so often.


It takes on kind of a "snot" like consistency.

After about 5 hours, I felt the consistency was right and I poured it into an empty, clean half gallon milk jug, and one empty, clean liquid soap dispenser. It feels good and it smells good.


So here's the recipe:

2 ounce bar of soap, grated
76 ounces of water
1 Tbsp glycerin
12-15 drops of essential oil (optional)

Good luck! Make something nice-smelling! :)

Wednesday, March 7, 2012

Fish and chips

This recipe will be all about the fish and not the chips. (You can find my recipe for those in the January, 2012 archives.)

I love Trader Joe's. If you've been reading any of my posts here, you will know that quite well by now. We were shopping there the other day and I spotted a mismarked package of Alaskan Cod, so of course I searched through the whole pile of packages but this was the only one that was mismarked - and it was half the price of the others. What a find! And for my relatives that are now thinking I must be related to "those" relatives - BE QUIET!!! :)


1 pound Alaskan Cod - cod or halibut work best for this kind of recipe
2 eggs
1.5 cups Panko style bread crumbs
1 tsp dill weed
1/2 tsp garlic powder or garlic salt
1/4 - 1/2 tsp cayenne pepper
1/3 C veg oil

Take the fish and pat it dry with a papertowel. Whisk your 2 eggs together in a shallow bowl. Place the Panko in another shallow bowl and add the dill, garlic and cayenne, stirring to mix in the seasonings. Heat the oil in a skillet over medium to medium-low heat. I cook on a gas range and medium is too hot, medium-low works best. You don't want the oil to smoke at all.

Dip each piece of fish in the egg to cover both sides and then into the panko mix, making sure all sides are covered, then right into the heated oil. It will really sizzle to begin with, but should settle down.


It will take about 4-5 minutes per side to come to a nice, golden color. You may need to turn each piece more than once to gain the color and done-ness you are hoping for. The time it takes will also depend on your burners. Place each piece when done, on a plate with a paper towel to soak up any excess grease.


I used to think that frying foods (like fish and fries) meant that you had to completely cover them with oil. Not true. There wasn't much oil in this pan and yet you are able to completely "fry" the fish to a nice, golden color. It should remain flaky and tender.


Look in the February, 2012 archives for my tartar sauce recipe, if you wish.

Tuesday, March 6, 2012

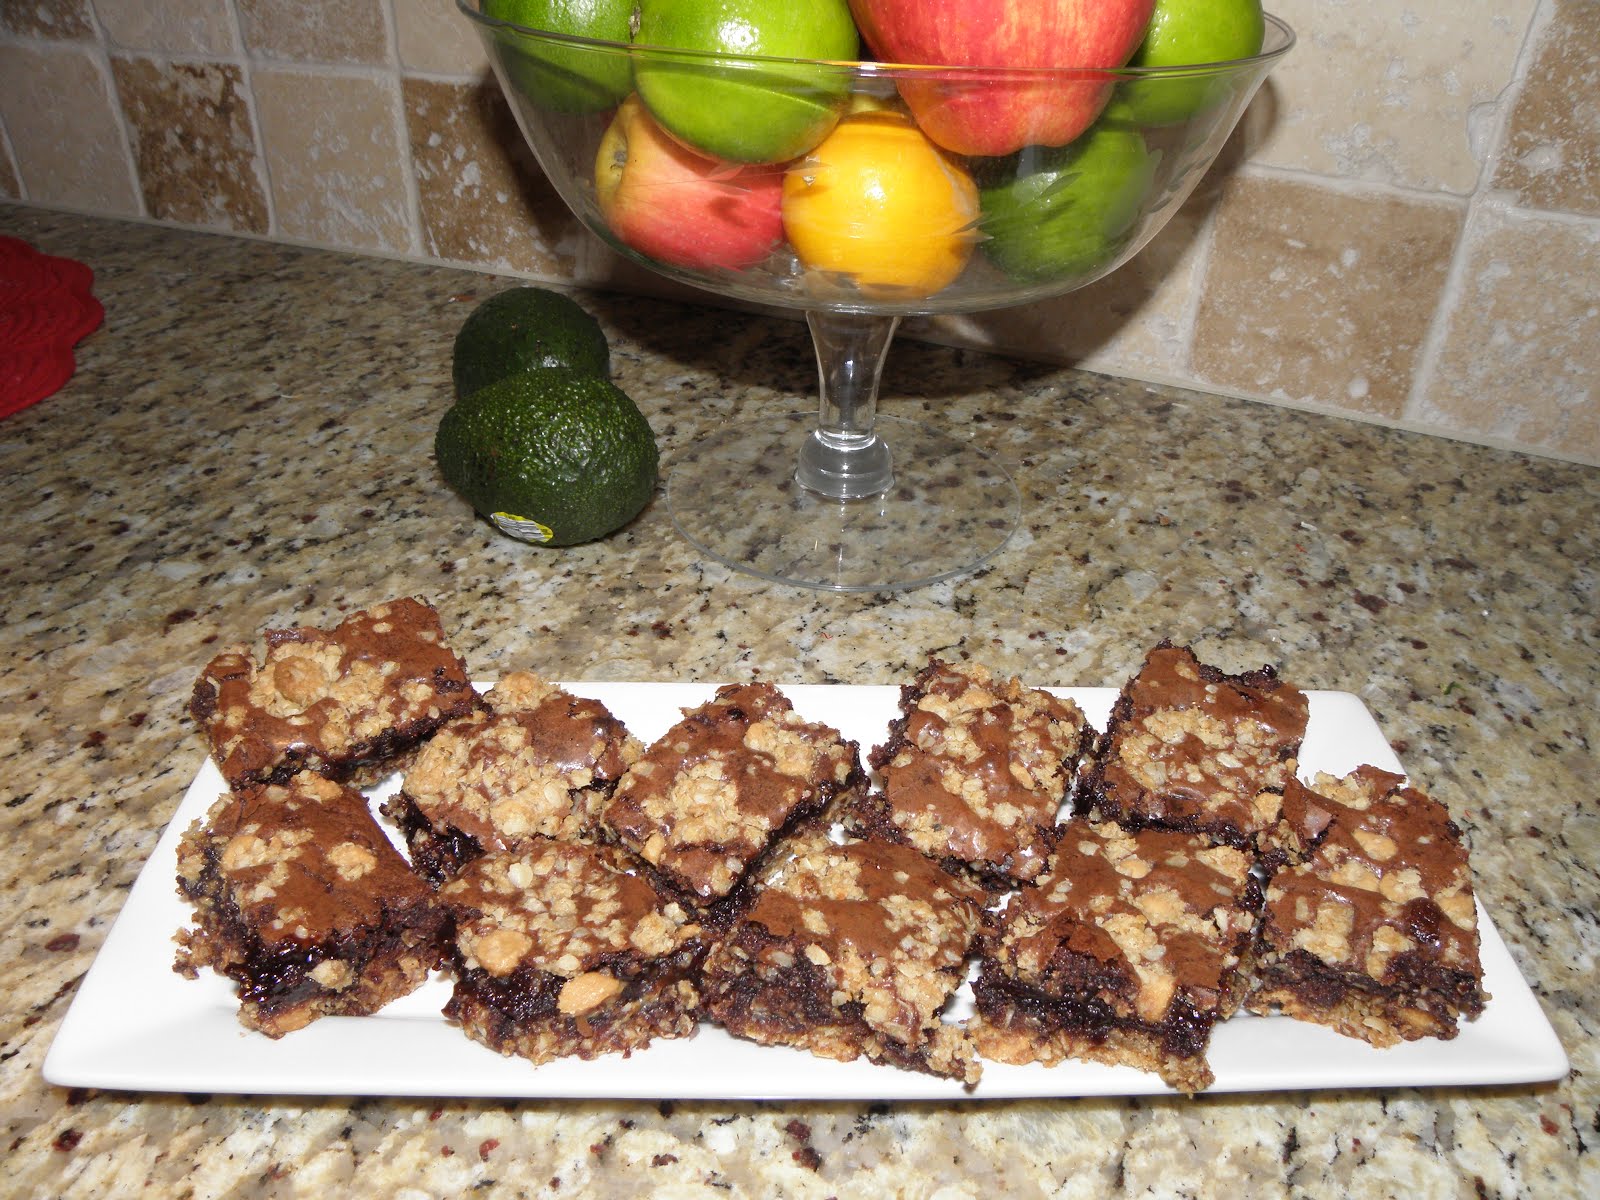
Surprise Oatmeal Brownies

I'm always thankful for modern appliances. Especially after listening to my Dad (born in 1926) talk about the "good old days" when there were no such things as microwaves, Kitchenaid mixers, dishwashers and things like that. Not to mention lovely things like cell phones and computers and the internet!

So tonight I thought I'd show my thankfulness for modern appliances by using some of them to make something with oatmeal in it. Rick has been hungry for oatmeal, so today at Sam's I bought one of those mega boxes of good ol' Quaker Oats.

1.5 C quick oats
1 C M&M's, or chocolate chips or peanut butter chips (I used PB chips here) (And that's the "surprise" in this recipe - whatever you add to it.)
1/2 C flour
1/2 C brown sugar
1/2 tsp. baking soda
1/2 C (one stick) melted butter
1 package brownie mix (I used Betty Crocker Fudgy Brownie)

Preheat oven to 350.

Mix all ingredients except the brownie mix and the "surprise". Save 1 cup of this oatmeal mix for the topping a little later.

Pat the oatmeal mixture into the bottom of a greased 9X13 baking pan.

Mix together brownie mix according to the package, add your "surprise" ingredient and then pour over the crust. Sprinkle the saved oatmeal mix over the top of the brownie mix.

Ready to go into the pre-heated oven.

Bake at 350 for 32 minutes. Cool completely and then cut into squares. These are nice, chewy brownies, but they won't be that way if you cut into them too quickly.


Just out of the oven, after 32 minutes.


I've heard stories that the North Dakota farmhouse we lived in until I was 4 years old didn't even have running water until after I was born, the youngest of 5 kids. I can't even imagine! So, here's to modern conveniences and my thankfulness for them! As a result, we are enjoying yummy brownies tonight, about 1,400 miles away from that tiny little farmhouse.

Saturday, March 3, 2012

Banana Pancakes

I had some dead bananas and I was hungry for pancakes. So, what a great excuse to make banana pancakes!

2 C Bisquick mix
3 eggs
2-3 very ripe bananas
1 C milk


Mix the eggs, bananas and milk together with a hand mixer or in the bowl of a stand mixer until the bananas are fairly mashed, then add the Bisquick. Continue to mix until most of the lumps are gone, but don't overmix.


Heat a skillet or griddle with a little butter, then add the batter mix in 1/3 cup measurements. I only put 2 scoop fulls in the skillet at a time, otherwise they tend to blend into each other.

Leave on that side until the mixture starts to form small bubbles on top. Take a pancake turner and gently turn the pancake to the other side. It will only be another 60-90 seconds until it is done. Remove to a plate and scoop up some more batter.


This recipe makes about 10 small-ish pancakes. The banana flavor is not overpowering. Just noticeable and yummy.

Thursday, March 1, 2012

Easy Beef Roast (Plus easy beef stew)

The key word in the title is easy. This one is so simple and yet such a crowd pleaser because it is so tasty. People will think you really outdid yourself to make such a tasty meal! (Beef stew recipe follows at the bottom of this.)

Today I am using a Beef Top Round Roast (because it was on a BOGO sale) but you can use pot roast, pork roast or any kind of roast you choose.


Here are the things you will need:

2-4lb. roast
1/4 C Au Jus mix* (or one packet)
1/4 C brown gravy mix* (or one packet)
1 packet of dry onion soup mix

*I buy the large plastic containers of this at Sam's or Costco

Preheat oven to 225.

I use my Dutch oven, but if you don't have one, use a skillet to brown your roast on all sides. It only takes a couple minutes per side to brown the roast. This seals in the juices. (Use about a tablespoon of oil in the pan to brown the roast with.)

When your roast is browned on all sides, if you are using a Dutch oven, add your gravy mixes and onion soup mix now, along with 4 cups of water. If you're not using a Dutchie, use any oven-safe casserole that has a lid. Transfer the browned roast into the casserole and then start adding the other ingredients.


(In order to get it brown on all sides, you may have to hold it with tongs when it's on the narrower sides. This is a 2.25 pound roast.) And by the way, this manly hand holding the tongs is not mine. :)


This is what the browned meat looks like when you are ready to start adding the other ingredients.

Place in preheated oven for 3-4 hours. The meat will be so tender and the flavors mixed together are amazing! The gravy mixes you added at the beginning make a great sauce or gravy starter when the meat is done. Be sure to scoop a little of that over the top of the meat when you plate it.

If you want, when the meat is about one hour from being done, add some cut up potatoes, carrots or other veggies of your choosing. They will soak up a little of that juice and take on a great flavor.

Side note: Sometimes I add a little garlic and/or a little rosemary. Rick isn't as fond of rosemary as I am, and a little goes a long way, so I don't use it too often. I often add mushrooms to the gravy mix at the time I add the potatoes and other veggies. There are many variables, but I always use the same 3 mixes that are mentioned at the top. That doesn't vary - it's a great combination!

I am cooking for two, and obviously we won't be able to eat this much by ourselves. Whenever fixing a roast I always plan on having leftovers because it makes terrific stew the next day!


Beef Stew

There really isn't much of a recipe for this, because you are using mostly leftovers from the roast you prepared earlier. Be sure to save all the liquid from the roast to use in your stew.

Leftover meat from roast
Leftover veggies that you fixed with the roast
Leftover liquid from roast
1 potato cut into bite size pieces
1 can of whole kernel corn, drained
1 Tbsp cornstarch

Take the liquid from the stew and put into medium sized pot over medium-low heat. Take the cornstarch and a little water (maybe 2 Tbsp.) and stir the cornstarch and water in a small bowl until it is smooth, then add to the roast beef liquid. Add the cut up potato and bring to a soft boil, stirring to help with thickening. Reduce the heat and add your leftover meat, cut into small pieces. Add the corn and any other seasonings or veggies you might like. After about 20-30 minutes of simmering on low (stir every few minutes) it will be ready. Easy as can be!