Saturday, February 18, 2012

Peach Snow (Individual Servings)

This was a "dessert" that was often requested of my Aunt Myra, as she was famous for making it when we had family get togethers, or just dinner together sometimes. I've never made it in an individual serving, until today. I like it this way except for one thing. There weren't any leftovers. Boo hoo.

You will need the following for 4 individual servings:

1 can of peach slices, with juice
24 saltine crackers, divided into 4 bunches of 6 crackers
Cool Whip or Spray whipping cream

Take an individual dessert cup (or Sundae glass as shown here) and in the bottom place 3 crackers all crunched up. Place 2-3 peach slices and a little bit of the juice over the crackers. Top with a dollop of Cool Whip. Repeat this layer one more time and now sit back and enjoy some Peach Snow!


I miss you Auntie Myra!

Friday, February 17, 2012

Zippy Strawberry Lemonade


I love lemonade...well, really, I love anything lemon-y. And it doesn't have to be summertime for me to crave lemonade. I fix it year round.

12-16 fresh strawberries with the stems cut off
1 can of frozen lemonade
Sprite or 7-Up (diet is OK too)
1/2 C to 3/4 C sugar (I like less sugar for more sour taste, but if you want it sweeter, add more sugar)
1 lemon sliced into thin pieces

Slice the strawberries into thin pieces. (About 4-5 slices per strawberry). Save aside one sliced strawberry per glass, the rest of them will go into the bottom of your pitcher.

Add the can of frozen lemonade. The can will call for a certain amount of water, but instead of water use the Sprite or 7-Up.

Add the sugar and then stir. Take a small sample (I know it will be hard to keep it to a small sample) just so you can decide if you want to add more sugar or not.

When you have the sweetness to your liking, add the lemon slices and place the pitcher into the fridge until you are ready to serve.

When you are ready to serve, add one sliced strawberry to the bottom of each glass, add some ice and then pour in the lemonade. This makes a very pretty presentation.

I have made this more times than I could count and it is ALWAYS a big hit.

Creamy Rice Taco Casserole


When my cousin's daughter was engaged to be married, she looked through many magazines to find the wedding dress she wanted. She ended up having a dress made, because she liked the sleeves from one dress, the neckline from another, the bodice from another and so on. That's kind of how I cook....I take inspiration from many sources and then kind of combine them and see what happens. It doesn't always turn out perfect but I've come up with a few pretty good combos over the years and this is one of them.

This recipe is somewhat inspired by the burrito bowl from Chipotle Grill, as well as 2 different recipes I saw in a cookbook.

The ingredients you need are:

2 lbs of hamburger
1/2 an onion - chopped
1/4 C taco seasoning (if you buy the big containers of taco seasoning from Sam's or Costco) if not, then 1 package of taco seasoning.
1 C grated cheddar cheese
1 C grated pepper jack cheese
1 can whole kernel sweet corn, drained
1 can chili beans (with liquid)
1 16 oz. container of sour cream
1 C uncooked rice (I used Jasmine)
2 C chicken stock/broth (or if you'd prefer, just water will do)
1/4 C (or more) chopped cilantro
Salt and pepper to taste
More sour cream and some hot sauce at the table for topping, if you wish.


I love to use my Dutch oven. I like as little clean up as possible, so when I can, I do everything in the Dutchie. Tonight I had to use 2 pots because while I had the hamburger browning in one pot, I needed rice going in another. 2 pots - big deal. Most people have at least that many in their homes. Ooops....we're talking different kinds of pots now....sorry!


Brown your hamburger and drain it. While it is browning, put one cup of rice in a small pan and 2 cups of chicken stock. I love to fix rice for any dish with chicken stock instead of water because it adds a nice flavor. But if you don't want to, or if you don't have any chicken stock on hand, go ahead and use water. The key here is to use 1 part rice to 2 parts liquid. This is one of the only times you will really catch me using a measuring cup. I love fluffy, non-sticky rice, and I've found that happens when I've been good about measuring the rice and the liquid.


For cooking your rice, once you have added the liquid, turn the burner on high. When the liquid starts to boil, reduce the head to low, put a lid on it and set a timer for 20 minutes. I keep a fork handy to fluff the rice every 5 minutes or so. You can use any kind of rice you want to but I use Jasmine because it fluffs nicely and I can get it at Trader Joe's for cheap! (No, I don't own stock in TJ's!)


Back to the Dutch oven now. Add your chopped onion to the meat, as well as your taco seasoning. No need to add water because you will get enough liquid from the can of chili beans when you add them in right now. At this point keep your burner on low and stir frequently. Turn oven onto bake at 350.


When the rice is done, there should be little to no liquid left. Just nice, fluffy rice after 20 minutes. At this point, turn the burner under the meat off. Stir the sour cream and corn into the rice. If you are using the Dutch oven as I have, spread half of your grated cheese over the meat. If you are not using a Dutchie, take a casserole dish and lightly grease it. Pour the meat into the dish and spread it out evenly, spread half of the cheese over that and now we'll continue with the rest of the recipe.


Spread the rice mixture on top of the cheese and meat. Then sprinkle the chopped cilantro over that and top with the remainder of your grated cheese. Bake uncovered in the oven at 350 for 25 minutes.


Ready to go into the oven


Here it is plated with a side salad.

Variations: I used hamburger tonight but this would go well with stew meat cut into real small pieces, shredded beef, chicken or even pork. You could also add jalapenos if you wanted to kick it up a little.

For the next post I will tackle something more difficult like the perfect Strawberry Lemonade or some such thing!

Tuesday, February 14, 2012

Mexi Stuffed Shells


It seems like I've been posting almost all chicken recipes lately, so since it is Valentine's Day I decided to spice things up a little bit. Hey, I'm talking about seasonings and spicy sauces and things - what were YOU thinking about?!

Purusing the items in the pantry and in the fridge, I decided to do something different. Well, at least different for me. I like Mexican food but I don't have any tortillas on hand. And I don't feel like just having taco salad tonight. Again. (Even tho' it is a favorite.)

So here goes....let's stuff some good tasting things into a jumbo pasta shell! I'm cooking only for 2, so if you need more, then adjust the amounts upwards.

12-15 Jumbo pasta shells
1 pound hamburger
1/2 package of cream cheese (about 4 oz.)
1 package taco seasoning
1 can refried beans
1 cup salsa
Hot sauce to drizzle over the top
1 cup cheddar cheese (or a mix of cheddar and jack)
1-2 Cups crushed frito chips
Sour cream for garnish
Green onions for garnish


Brown the hamburger and then drain the fat. Add the taco seasoning and a half cup of water, let simmer for a few minutes until the water is nearly gone. Make sure to stir in the taco seasoning so it is spread throughout.


Cut the cream cheese into one inch cubes and add to the hamburger. Cover. (I know this looks like I added marshmallows to the hamburger - I assure you the only thing I have been drinking today is coffee, so no, those are not marshmallows!)

While the cream cheese is melting into the hamburger, put the pasta shells into a pot of water (with a little salt) and wait for it to boil. (I don't think I need to tell you that you must turn on the burner if you have any hope of the water ever boiling!)

Check on the meat to see how the cream cheese is doing. When it starts to melt down, stir it around so it gets well mixed with the meat.

Preheat oven to 350.

Bring the pasta to a boil and then remove from heat. You want them to still have some stiffness but not to be crunchy. They will finish cooking in the oven. Drain the pasta and toss with a little butter to keep them lubed.

Add the refried beans to the meat and mix thoroughly. Remove from heat and let it sit just long enough that you can handle it without burning your fingers.


Take your casserole dish and pour the salsa in the bottom. Stuff some of the meat mix into each shell a spoonful at a time. Overstuff the shells - it is ok if some oozes out when you set it into the casserole dish. Continue until all of your shells are stuffed. Drizzle some hot sauce (like LaVictoria or Taco Bell) over the shells. Cover with aluminum foil and place into the oven for 30 minutes.


Crush some Frito chips (about 1 or 2 cups, depending on how crunchy you want it) and set aside.

At 30 minutes remove the dish from the oven and sprinkle the chips and the cheese over the top and return to oven for 10 minutes.


This is what it looks like, after the chips and cheese have been added, and it is done baking.

When you plate your shells you can then garnish with sour cream and/or green onions if you wish.


Here it is plated along with a small salad with Bleu Cheese Dressing. (No, that's not for ME! I don't eat Bleu Cheese dressing!)

SIDENOTE: This meat mix with the cream cheese and refried beans is terrific and would make a wonderful dip for chips. In fact, when I was done stuffing the shells I had about a cup of meat mix leftover and it went into the fridge with chips in mind for tomorrow!

Monday, February 13, 2012

Apple Chicken Salad

I already knew what I wanted to fix for supper before I left for the grocery store. The only reason I needed to go to the store was to buy a "bag of salad." Or so I thought. I should have taken a closer look, or any look at all, and I would have realized I was out of eggs AND Panko crumbs! Horrors!

So, when I started to make supper I realized it was either improvise, or go back over to the grocery store. I was already in my comfy clothes and with hair clips removed, so improvising won out.

I like chicken. Don't get me wrong, I love red meat too. But chicken is so versatile - I would have said flexible, but that would have conjured up images that aren't necessary when talking about a dead chicken - so I like to use chicken a lot, being that it is versatile and all. One of our local chains of grocery stores, QFC (which is part of the Kroger family of stores) often has boneless, skinless chicken breasts BOGO. (Buy one, get one.) This past week was one of those times and I bought a lot. I like the way they package it because I can get one breast in a package and that's all I usually need when cooking for just two people. There are a lot of breasts in the freezer now. (Chicken breasts, remember?!)

Here comes the improvisation....I didn't have eggs to dip the chicken into, so I decided a mixture of mayonnaise and spicy brown mustard would do. I didn't have Panko crumbs, so some crackers would have to do.

Here's what I used:

1 boneless, skinless chicken breast
1 C mayonnaise
3 Tbsp spicy brown mustard*
3/4 sleeve saltine crackers
Oil for the pan

Mix the mustard and mayo together in a shallow bowl. Crush your crackers in a zip loc bag with a rolling pin. Don't get too aggressive with that rolling pin or you'll poke a hole in the bag and have crumbs everywhere. Put the crackers in another shallow bowl.


Cut your chicken into small pieces. I usually start by slicing it the long way to get a thinner piece, but not paper thin. I can get 3 thinner pieces from most breasts. Then cut those into smaller pieces - the size of chicken nuggets or chicken strips. ***In case you're really scrutinizing this picture and notice a bowl with what looks like eggs in it, you'd be right. I just used the same picture from another post a couple weeks ago to demonstrate the cutting technique. I'm lazy like that. I really didn't have eggs tonight, even though you see them in the picture. Please don't sue me.***

Take a knife and spread some of the mayo mix on a piece of chicken, coating all sides. Then roll in the cracker crumbs (or Panko crumbs if you're lucky enough to have some on hand.) In a skillet over medium-low heat, heat some oil or butter, or a combination of the two. Place chicken piece into the skillet and repeat until all chicken is in the skillet. (I recommend using a knife to coat the chicken rather than rolling it in the mayo mix, or you'll get too much on one piece.)

The thin pieces will cook up fairly fast, so do keep an eye on your chicken. But while it is browning, go ahead and prepare the salad portion of this meal.


For the salad:

I am lazy - I almost always buy the already-prepared bags of green mixes. I like carrots and purple cabbage and colorful things in it for variety. Use as much salad mix as you want for each person.

Top the salad mix with chopped green onions, if you wish. 1 green onion per plate. (More about the green onions later.)


Dried cranberries* - maybe about 1 Tbsp per salad
Candied Walnuts* - about 6-10 pieces per salad
1 apple chopped into small-ish bite size pieces, divided between 2 salads
Add your chicken pieces and then spinkle some grated Cheddar, Jack or Mozzarella cheese over the top - as much or as little as you like.


Top it with your favorite dressing. I love Marie's brand Creamy Chipotle Ranch dressing with any salad that has chicken in it.

*I love Trader Joe's. I get so many neat things there; things you don't find in every store. And if you DO find something similar in other stores I guarantee they will charge more than Trader Joe's prices. I go there, on average, about once a week. That is where I buy the dried fruits, candied nuts, and the spicy brown mustard, along with lots of other neat things.

I promised you I would tell you about the green onions. I saw a post on Pinterest about regenerating (if you will) your wilted green onions. I'm guilty of throwing away so many green onions from the fridge after they've gotten a little wilty or slimy. I use a lot of green onions, but rarely do I use a whole "bunch" of them before they start going bad. So, this post about regenerating them said to cut off all the greens parts, right down to where the white part begins. (The bottoms will have the root 'hairs' hanging down.) Place those white ends in a glass with a little water in it (maybe 2 inches) place them in the kitchen windowsill and then watch those greens grow right back! I admit I was skeptical that it would really work, but it does! I change the water, or rather I pull them out and put them in a new glass of water every other day. And when I cut off the green part, I put it right back into the glass of water, and watch them grow again. Seriously, you will go from just the white part to at least 6 inches of green onion in just 4-6 days. The picture above that shows the green onion - that is one I have regrown.

Someone said that after about 3, maybe 4 regrowings they kind of lose their flavor. I'll see how that goes for me. But for now I'm kind of excited about not having to throw away wilty or slimy green onions, and I don't have to buy them all the time. I'm cheap like that.

Friday, February 3, 2012

Ramen Noodle Chicken


This dish is kind of Asian meets Tex Mex, or something in-between. It will only take a few minutes from start to finish. This serves 2-3 people.


These are the items you'll need.....

1 boneless, skinless chicken breast
2 packages chicken flavored Ramen noodles
2 eggs
1 C Panko crumbs
1/3 C shelled peanuts, chopped rough (not tiny pieces)


1 handful cilantro (a handful after being pulled from the stems)
Butter or oil for the frying pan
Creamy Chipotle Ranch salad dressing (Marie's brand is what I use)


Take the chicken breast and cut it into thinner pieces by first slicing it the long way. Careful not to make your pieces paper thin, but you should be able to get about 3 thinner pieces from the one breast, and then cut those into smaller pieces. (Maybe about the size of chicken nuggets or tenders.)

In a bowl, whisk the 2 eggs together. In another bowl, pour the Panko crumbs. In the frying pan, heat some oil or butter to fry the chicken in. You don't need enough to cover the chicken; just enough to give it some lube.


Dredge each chicken piece in the egg, then in the Panko and then place into your frying pan, where your temp should be on the low side of medium. (I cook on a gas stove and medium heat is too high.) These will cook up fairly fast, and you don't want to burn them, so do keep an eye on them.


Put about 2-3 cups of water in a medium pot to boil. Add the 2 packages of ramen noodles, but not the seasoning. Boil the noodles just enough to make them soft, then drain all the water off. Add the seasoning packets and mix thoroughly.

When your chicken is done (browned lightly on all sides) remove it from the heat. ***Even tho, in this picture the chicken pieces fill the pan, remember this is only ONE chicken breast. It goes a long way when you cut it into smaller pieces.*** Place a generous serving of noodles on a single serving plate, top it with some of the chicken pieces, some of the chopped peanuts and some of the cilantro. Put some of the Creamy Chipotle Ranch dressing on top, as if you were dressing a salad. Now eat! (You don't have to put the dressing on it to make it delicious. I really love the dressing on it though.) But this recipe will not be complete if you leave off the cilantro and/or the peanuts. They really make the flavors pop.

Pictured here are 2 servings (along with a side salad) but this could have easily been made into 3 servings.

Wednesday, February 1, 2012

Laughing Cow Chicken

I love sales. Especially on stuff I buy all the time, even when not on sale. This week QFC was having boneless, skinless chicken breasts, BOGO. (Buy one get one free). So, into the cart went 8 packages and I saved about $45. We eat a lot of chicken, and it's so versatile.

I saved out a solo package to use for supper that very night but wanted to do something different. Looking into the fridge for ideas and inspiration I spotted my little round container of Laughing Cow cheese. I love that stuff and imagined it would go great with some chicken.

So, a few minutes later a new creation was on its way into the oven.

Recipe for 2 people

1 large boneless, skinless chicken breast
1/5 onion, rough chopped
3 wedges Laughing Cow Cheese (I used Garlic & Herb this time)
Butter
Wooden skewers or long toothpicks


Preheat oven to 350

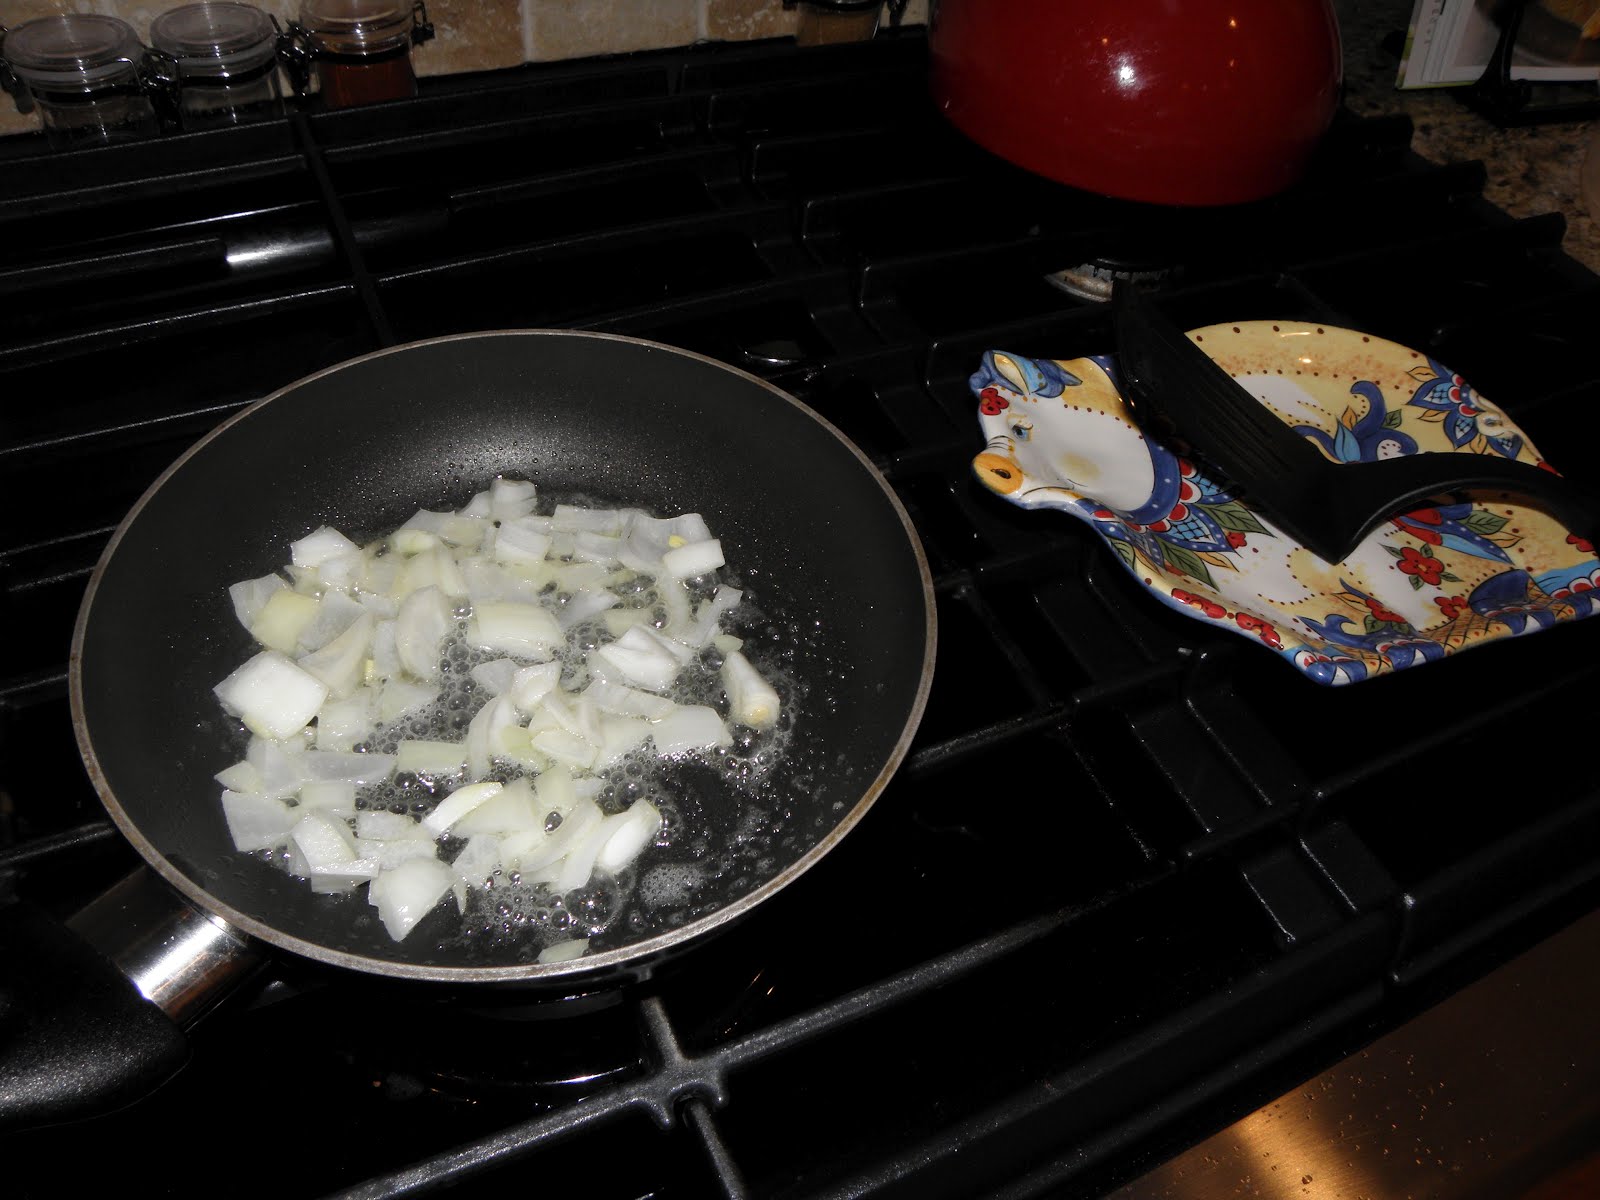
Chop the onion into small but not fine pieces and saute in skillet with a little butter until opaque. Slice the chicken breasts lengthwise into 2 or 3 pieces, so each piece is thinner but not see thru. (This was a larger breast piece so it was easy to get 3 good pieces. Others might yield only 2 good pieces.)


(Don't you love my pig plate that I use as a spoon rest?!)

Lay each sliced chicken piece flat and put 1/3 of the onions on the center of the chicken. Top with one unwrapped wedge of cheese, then roll up to make a "log". Put a skewer near the 2 outer edges of the roll and place in baking dish. Repeat until all ingredients are used.


Put a little dollop of butter on top (maybe 1-2 tsp per chicken piece.) Salt & pepper, then place into 350 oven for 45 minutes.


This is the end result, alongside some garlic parmesan potatoes from Trader Joe's. It was all yummy!